After 10 years of service, my old laptop was getting a bit long in the tooth. Although it was working perfectly fine, those 10 long years had taken a toll on it’s battery, let alone it was on it’s third power supply, so it was finally time to get a replacement so it could retire doing something else less mobile.
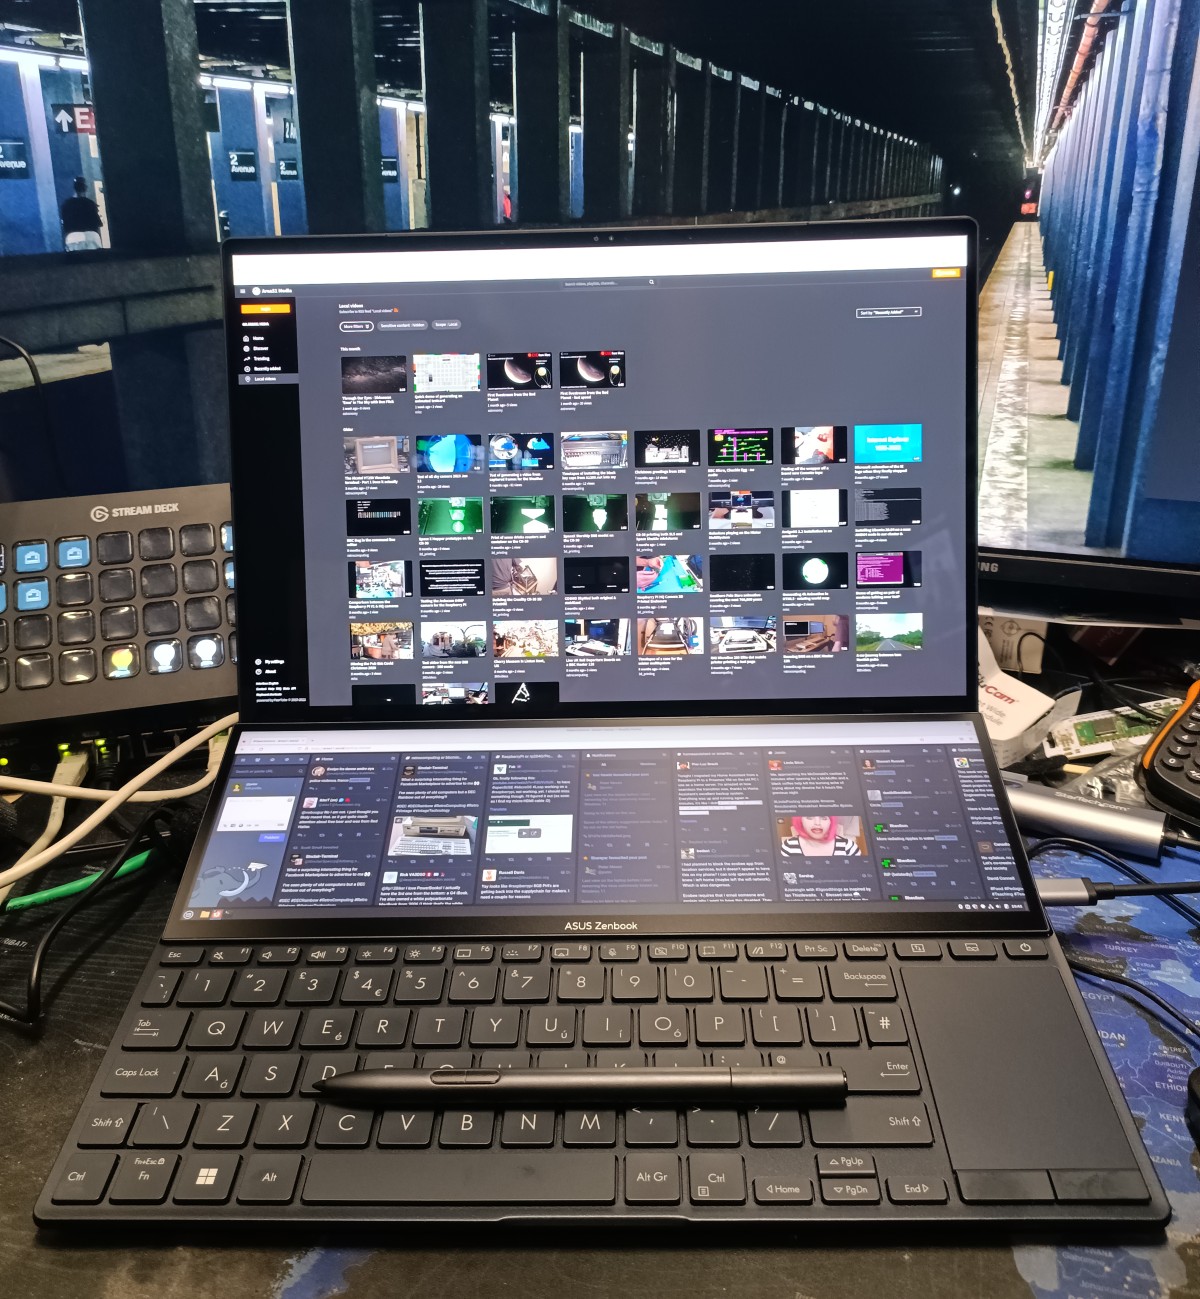
in the end I opted for an ASUS Zenbook Duo Pro 14 which among other things has 2 touch screens built in – yes 2 screens!
The old laptop
The old laptop as an Acer V5-171 notebook I purchased in early 2013. It had a Intel i3-3217U dual core processor providing 4 threads, 8Gb ram and a 250Gb hard disk. Within a week I had upgraded it to 16Gb of ram and a 512Gb 2.5″ SSD – the latter improved the battery life enormously.
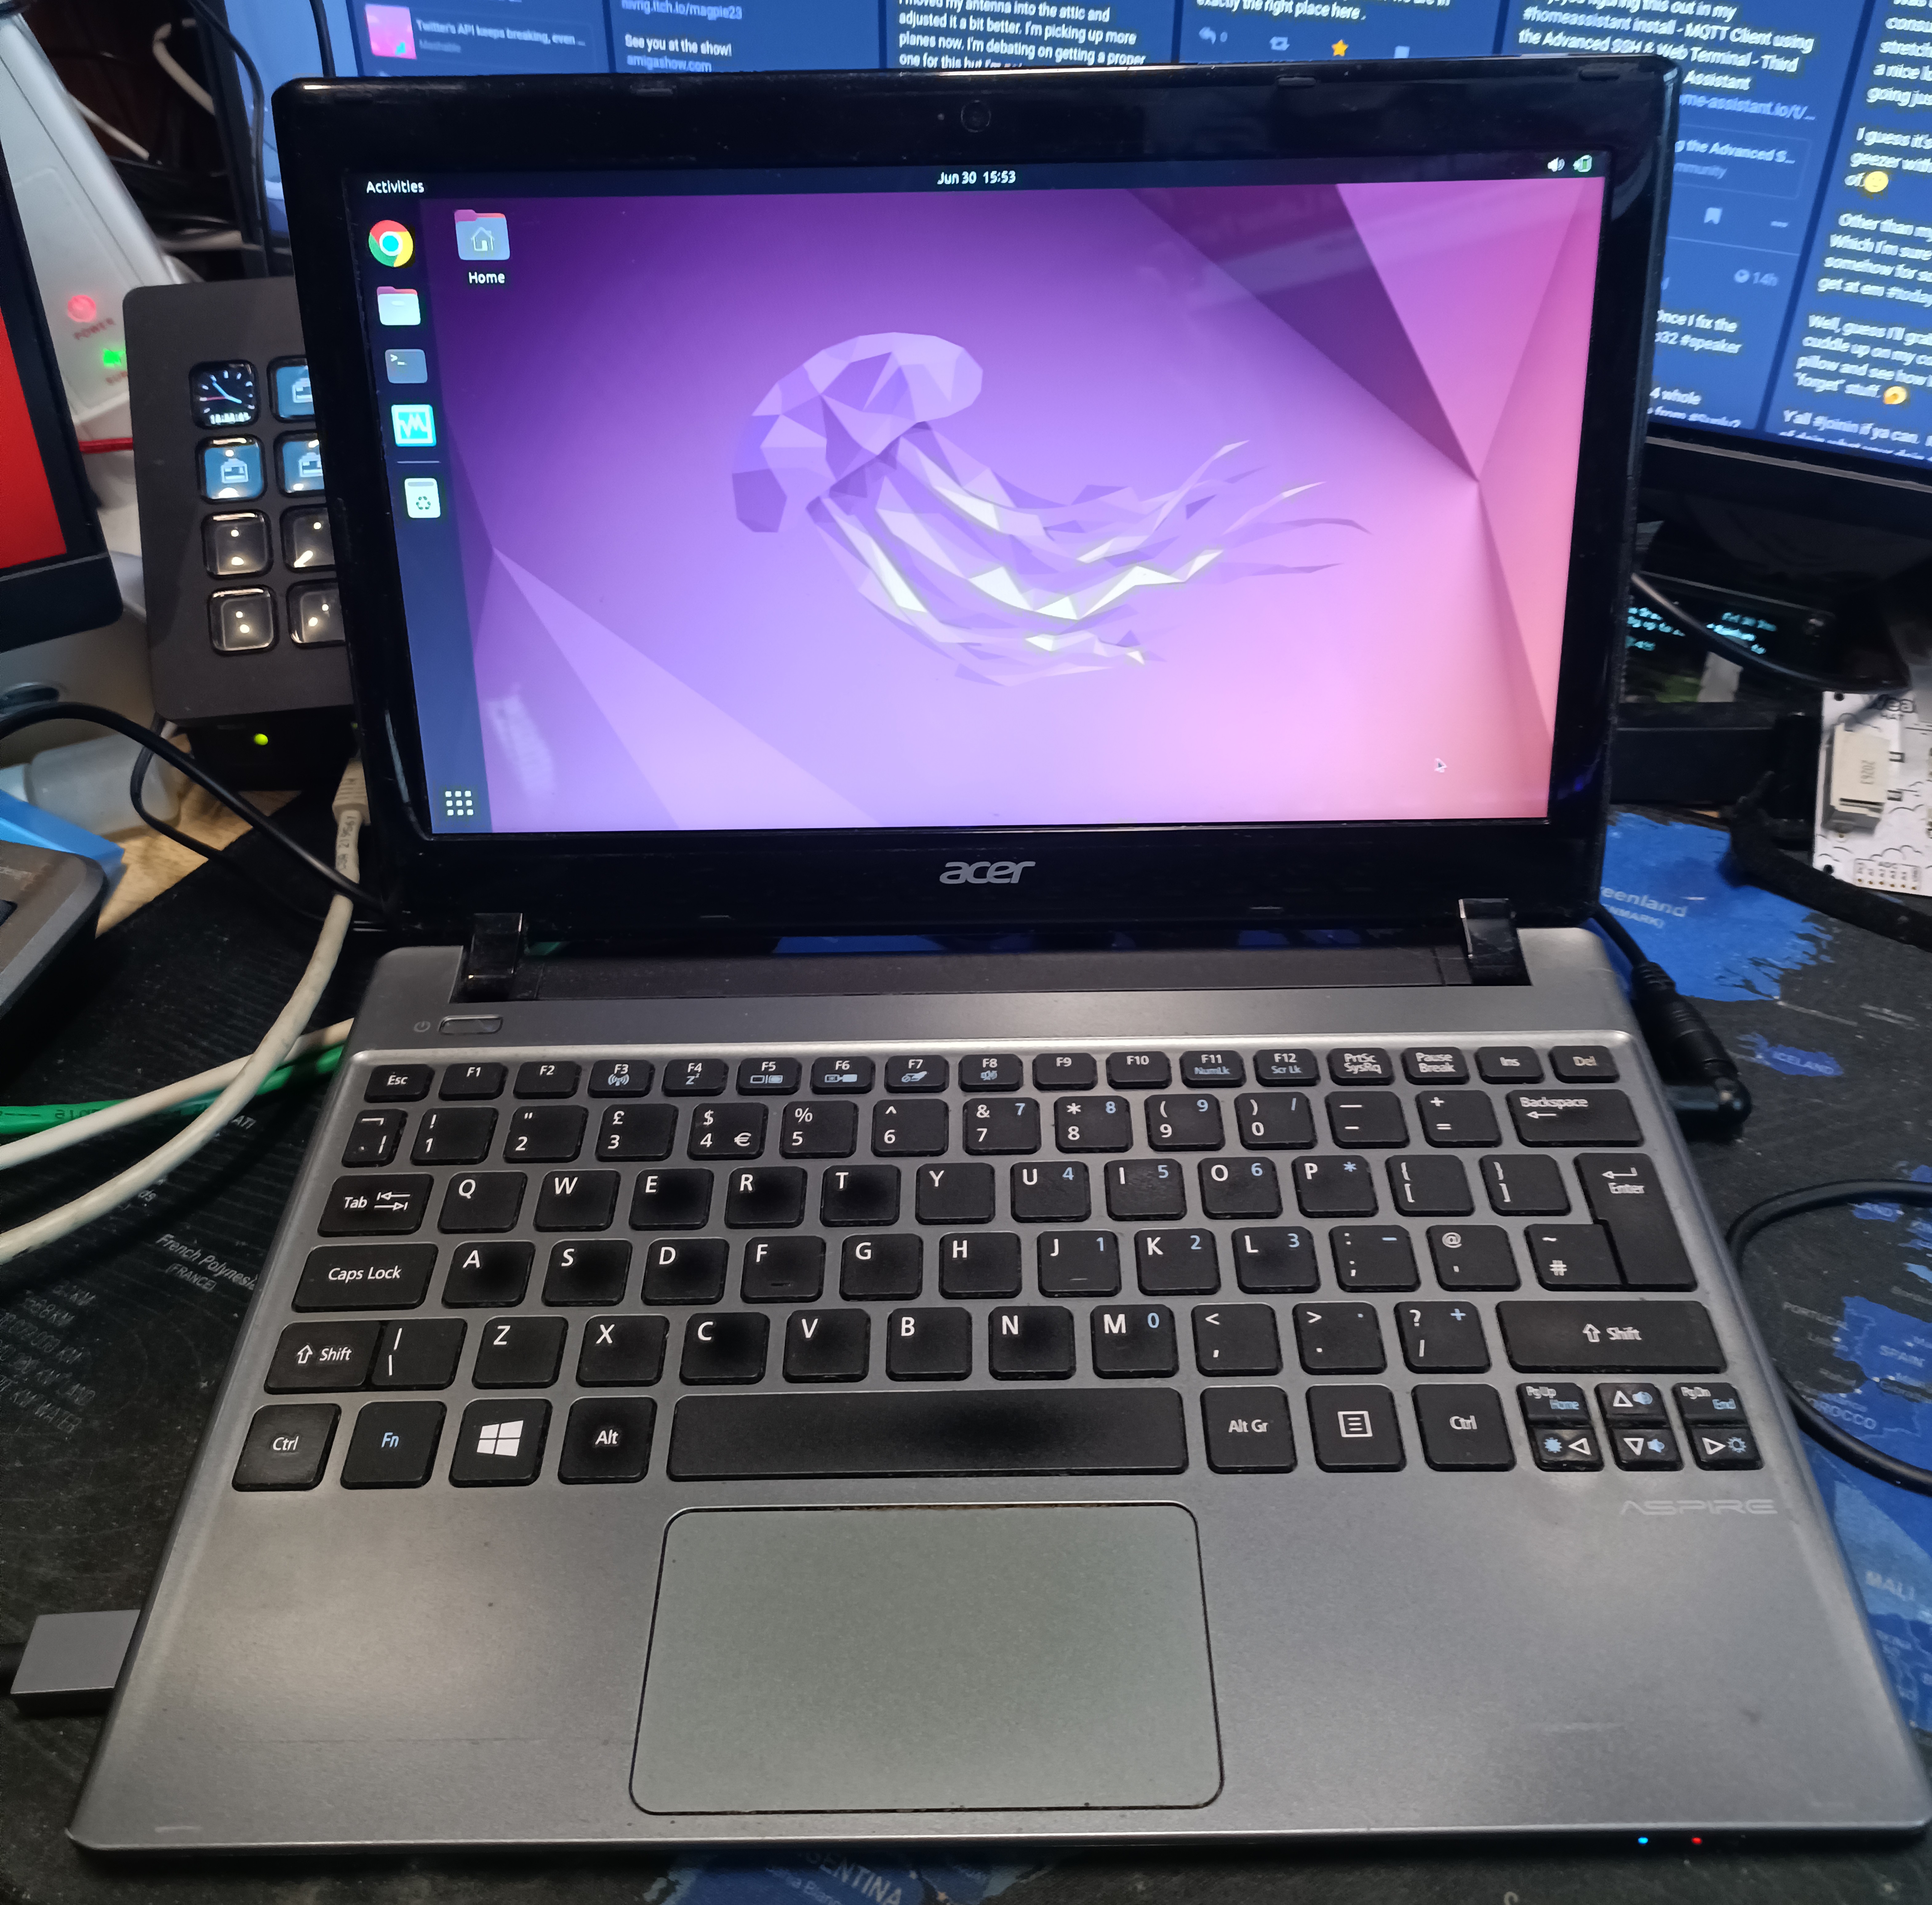
This machine served me well for the next 10 years, although it’s now on it’s third power supply. It’s had several rebuilds, alternating between Ubuntu and Linux Mint. The image above as last night where it’s still running Ubuntu 21.04.
It is still pretty capable for it’s age. Even though it’s got a 1Gbe ethernet port built in, with it’s single USB3 port I’ve had it handling 2.2G transfers with a 2.5GBe USB3 dongle (via iPerf).
The only issue these days is the battery which now only lasts about 30 minutes before it needs charging.
The new Laptop
So the new laptop, I ended up going for the Asus Zenbook Duo Pro 14 UX8402ZA, which is a 14.5″ laptop. It has an Intel i7-12700H 14-core processor, yes 12 more than the old machine, comprising of 6 performance cores and 8 eco-cores giving it a total of 20 threads.
It also has 16GB DDR5 RAM, 512GB Nvme and 2 screens which in itself is unusual for any laptop – the main one a 2880×1800 120Hz OLED and a secondary 2880×864 120Hz beneath it – both touch screens. There’s also a stylus pen which works on both screens.
Ports are lacking a bit as it only has a single USB-A and two Thunderbolt-4 ports on the right. It does however have a combo headphone jack on the left hand side and a standard hdmi and a micro-sd slots on the back.

As this machine does not have an ethernet port I also got a StarTech USB-C 2.5Gb NBase-T adapter so I can connect it to my home network at speeds better than WiFi.
Removing the common virus known as Windows 11
First thing I had to do was to disable secure boot. Most modern distributions support it but I personally still disable it in case I want to try one that doesn’t. I won’t go though the procedure here, but xda-developers has a good guide on dual-booting, in my case I only did the part for disabling Secure Boot as I wasn’t going to keep Windows.
The only difference to that flow was that once secure boot was disabled I also had to change the boot order so that the USB drive I had the Linux Mint ISO on was listed before Windows – otherwise Windows would still start on boot.
Installing Mint
This part was pretty much standard. Let the ISO boot until you got into the live cd desktop.
At this point I plugged in the 2.5Gb ethernet dongle and it was recognised instantly. I then started the install selecting the following options:
- Select install across entire drive
- Select ZFS as the root file system
- Select to install additional media codecs
After that just follow the install as normal.
Post Install
Once the install completed and the machine restarted, you’ll find that both screens are both present but the smaller lower screen is to the right of the main one on the desktop- not an issue, just change the screen layout so it’s below the bottom one. I also made the smaller screen the primary so the task bar is at the bottom.
The other issues are a bit more subtle:
Touch screens not working
Well, when I say not working, they actually were, to a point. It took a while to realise that, whilst both were working, they were referencing the main screen only, so if you tried to select something on the secondary screen it actually selected an area on the primary.
To fix this we have to tell xinput which screen the touchscreen is actually connected to.
First run use xrandr to list the displays:
eDP-1 connected 2880x1800+0+0 (normal left inverted right x axis y axis) 312mm x 195mm
DP-1 connected primary 2880x864+0+1800 (normal left inverted right x axis y axis) 310mm x 90mm
DP-2 disconnected (normal left inverted right x axis y axis)
DP-3 disconnected (normal left inverted right x axis y axis)
HDMI-1 disconnected (normal left inverted right x axis y axis)
From this you can see that display eDP-1 is the primary display and DP-1 the smaller secondary.
Next use xinput to see the devices X is using:
peter@tethys:~$ xinput | grep -i elan | grep pointer
⎜   ↳ ELAN9008:00 04F3:2F29             id=11	[slave  pointer  (2)]
⎜   ↳ ELAN9009:00 04F3:2F2A             id=15	[slave  pointer  (2)]
⎜   ↳ ELAN9009:00 04F3:2F2A Touchpad    id=17	[slave  pointer  (2)]
The first two are our touchscreens, so I created a bin directory in my home and the following script called setup-touch.sh:
#!/bin/sh
xinput map-to-output "ELAN9008:00 04F3:2F29" eDP-1
xinput map-to-output "ELAN9009:00 04F3:2F2A" DP-1
Make that script executable and run it. The touchscreens now work correctly.
To make this persistent depends on which desktop you are using. In Cinnamon its Preferences -> Startup Applications and add this script there.
Firefox with touchscreens
For some reason if you try to scroll in Firefox using the touch screen it selects rather than drags. This is easily solved by adding the following to the end of /etc/security/pam_env.conf
MOZ_USE_XINPUT2 DEFAULT=1On the next reboot this fixed it so it now scrolls on touch.
Audio
At first I thought the audio wasn’t working – turned out the volume had defaulted to 13%. Turned it up and it was deafening – the speakers are loud, so I’ve got it set to about 50% and it’s comfortable.
Font Sizes
You will almost certainly need to increase the default font sizes for everything.
With both screens being 2880 pixels wide everything is very small, to the point you might need a magnifying glass – literally the default font is that small!
So far I’ve found that changing the default font size from 10 to 14 or 16 works best, although some applications like slack and discord do not use the system values so you might have to change them on a per-application basis.
Finally
That’s about it for now, I know I will hit other issues as I start using this machine for real. So far it’s been working well although I’ve only had the machine for under 24 hours as I type this.
As for additional hardware I tested my Epson Monerio BT-40S “smart” glasses earlier. I tried plugging them in directly to this machine via one of the Thunderbolt ports rather than it’s own controller. The laptop not only recognised it but created a separate virtual screen which worked perfectly with them – only issue was the main screen went to a lower resolution, but that might just have been down to how much memory was allocated to the integrated GPU.
